
We would like to discuss how to use Power Automate to monitor your Qlik Sense Proxy Service (QPS), determine its availability, and send notifications to the appropriate technicians when it’s not accessible.
What is Qlik Sense Proxy Service?
The Qlik Sense Proxy Service (QPS) is responsible for session handling, authenticating users, and balancing the load. When a user accesses the Qlik Sense site the QPS will first deal with the user requests. The image below shows the Qlik Sense service architecture and shows how QPS works in a typical single node deployment.

Qlik Sense architecture (Source: Qlik)
It is wise for Administrators to be proactive and to ensure their Qlik sites remain active. It would be embarrassing for you to be notified by your Clients that a Qlik Sense site is down. Making use of Power Automate will allow you to be the first to know and deal with any issues before the business users notice. As shown in the architecture above, QPS is responsible for dealing with user requests. QPS is listening on port 443 or 80 if HTTP is enabled. QPS also deals with user authentication and sessions. So, when this service is down, users will not be able to get a session, delete a session or log in, resulting in Qlik Sense service outage. When a site is not accessible, this is the first service to check to make sure that it is working. This is why performing a health check on this service periodically allows a site administrator to be on top of things when something goes wrong.
There are a number of ways. to do this
We are, however, going to use the QPS API user endpoint that requires no user authentication.
https://yourrqlikserver.com/virtualproxy/qps/user
We will make an HTTP GET request to the endpoint and observe the HTTP status code. When the service is up, we should get a response with HTTP status code 200 and the following message:
{
“session”:”inactive”
}
The flow of our QPS health check notification would look like this:
- Use Power Automate HTTP action to make a GET request to the QPS user endpoint
- Observe the response HTTP status code
- If we received anything other than HTTP status code 200, then an email should be sent using Power Automates “Send Mail” action.
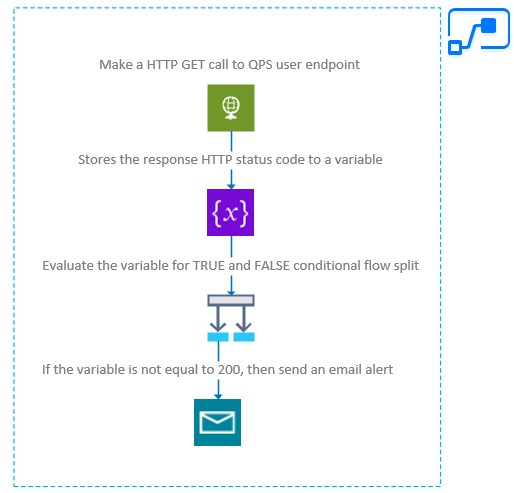
Power Automate notification flow design
Now that we have dealt with the design of the flow, let us go through the steps to build it.
Note that we are using “Scheduled cloud flow” for this exercise, which requires the Qlik Sense Proxy Service to receive traffic from the public domain.
If your Qlik Sense site is only accessible within a DMZ/corporate network, then you will need to set up an on-premises data gateway. More information on this can be found here.
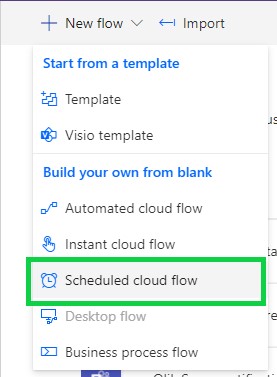
- Start a new flow by clicking “+New flow”.

- Then select “Schedules cloud flow”. This will open up a new flow window.
- Give your flow a name and set the frequency of the flow. In the example shown below, the flow is set to run every 10 minutes.
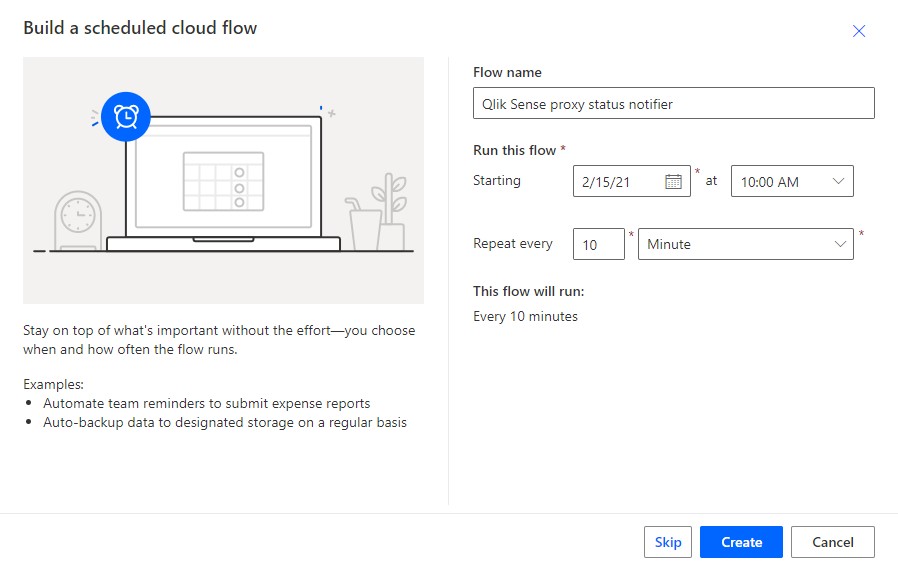
- Then click on “Create”.
- You will then be taken to the flow editor. Click on “+New step”.
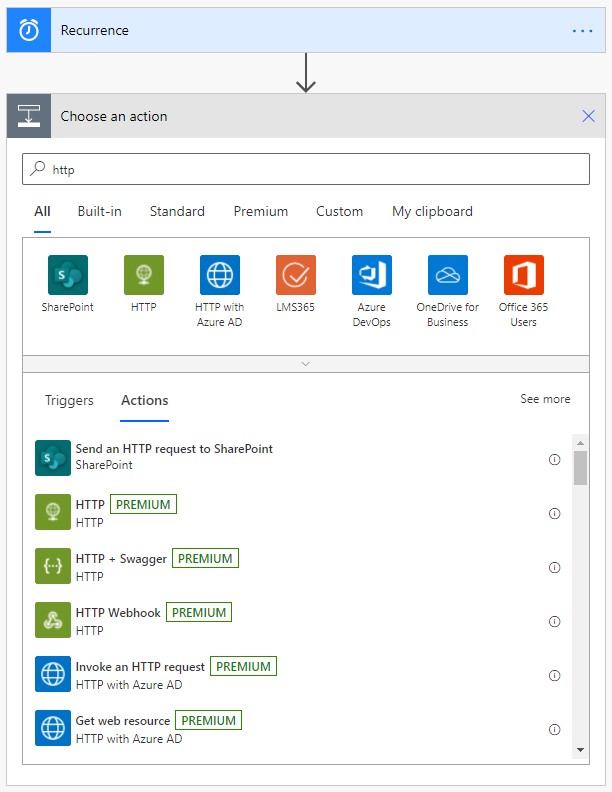
- From the prompt, search for “HTTP” and select the HTTP action as shown in the picture below.
- Now select “GET” under the HTTP method and enter the following address in the URI field.
https:// [YOUR_QLIK_SENSE_SERVER_ADDRESS]/[VIRTUAL_PROXY]/qps/user
Note: You must update the address with your own server details. There is no need for setting up any additional virtual proxy in Qlik Sense for this, as this endpoint will not require authentication. See the official documentation.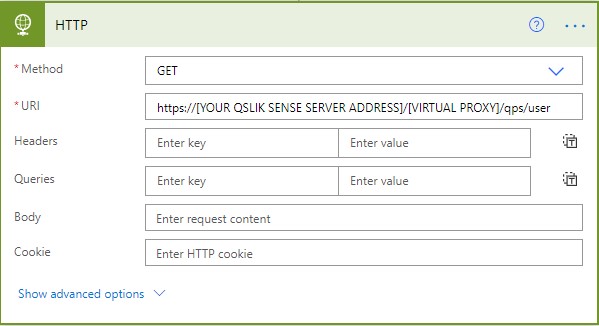
- Click on “+New step”.
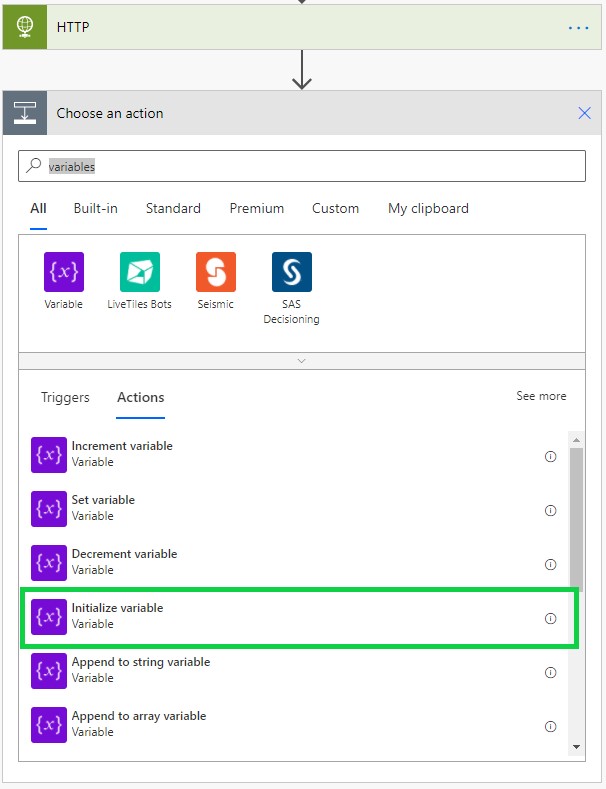
- From the prompt, search for “variables” and select the “Initialize variable” action as shown in the picture below.
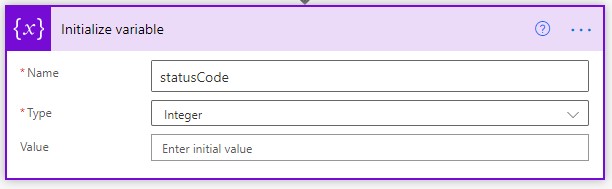
- Give your variable a name. e.g. statusCode.
- Set “Integer” as the variable type.
- Click on “+New step”.
- From the prompt, search for “condition” and select the “Condition Control” action as shown in the picture below.
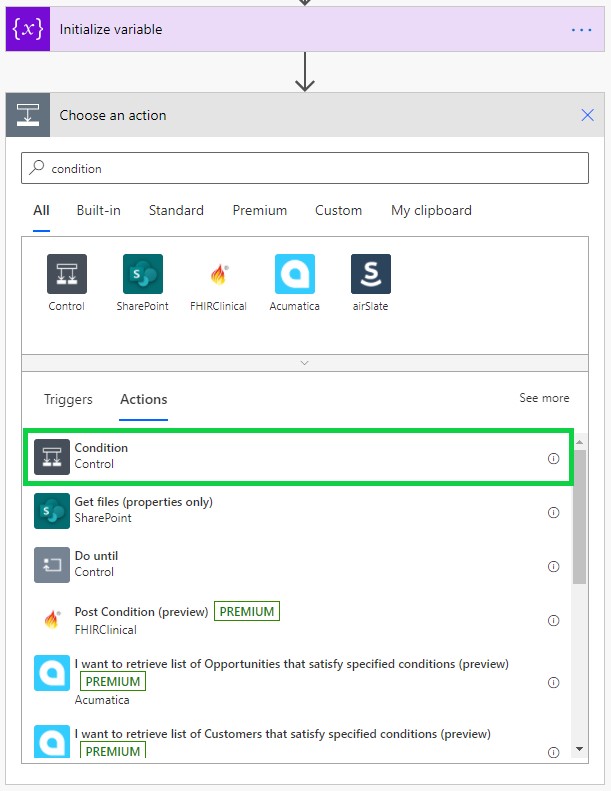
- This will give you condition flow configuration and two additional flows (one for when the condition returns TRUE and the other is for when it returns FALSE). Those flows are triggered based on the outcome of your condition. You will configure the condition first. Click on the first input box (in the “Condition” box) and select your variable (initialized in step 10).
- Pick “is not equal to” from the drop-down in the middle.
- Type “200” in the last input box. Your condition control should look similar to the picture below.
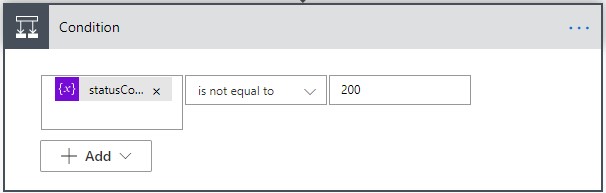
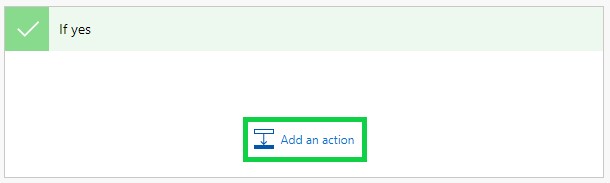
- Now click on “Add an action” in the “ if yes” flow.
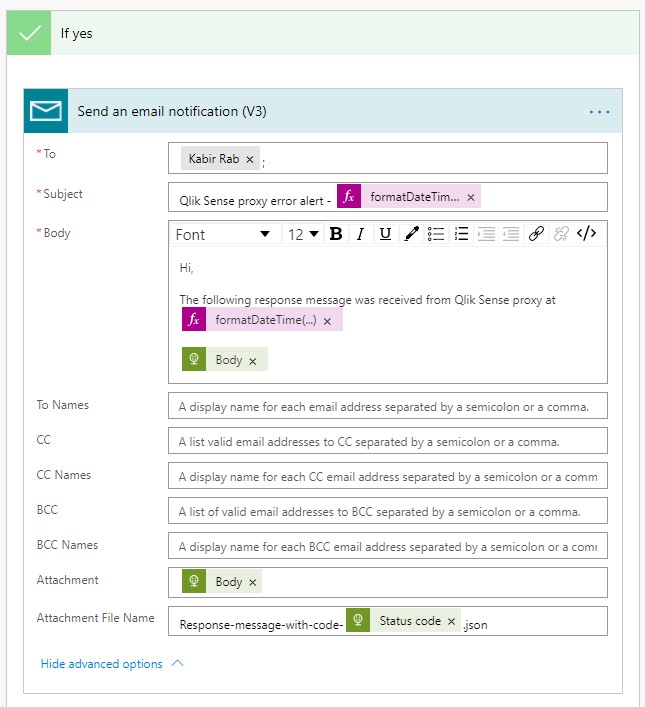
- From the prompt, search for “mail” and select the “Send an email notification (V3)” action as shown in the picture below.
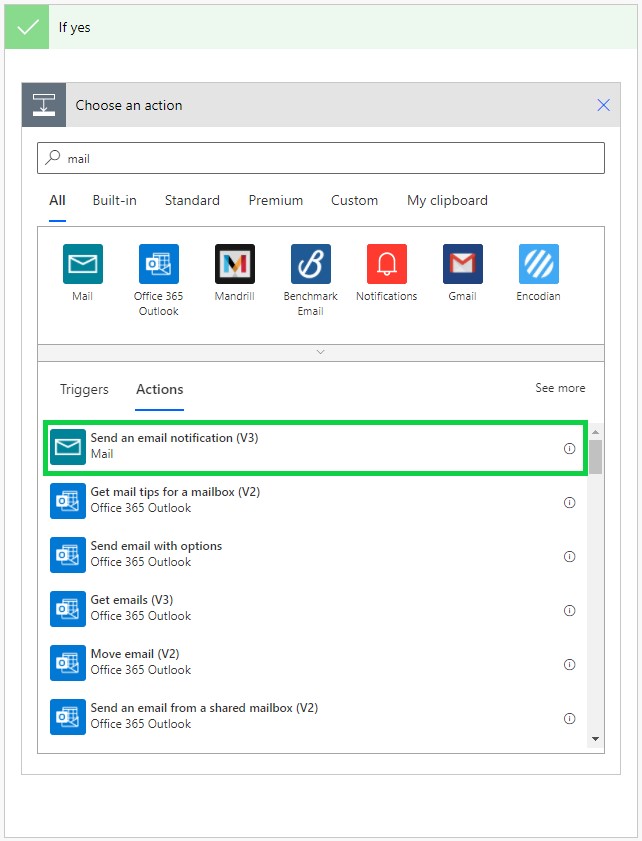
- Enter the email address you wish to send notifications to in the “To” input field.
- Type in your notification subject in the “Subject” input field. E.g. Qlik Sense proxy error alert!
- Type in the email message in the “Body” input field.
Note: you can use expressions, e.g. adding timestamp to the message to display when the error occurred – formatDateTime(utcNow(),’yyyy-MM-dd hh:mm:ss’). You can also include the JSON response or the response headers etc in the mail body.
Optional steps 22-24 - Click on “Show advanced option” in the mail action.
- Click on “Attachment” and then select “Body” from the list.
- Type in a name in the “Attachment file Name” input box. E.g. Response-message.json.
- Press “Save”.
Conclusion
Make sure you test your flow and inspect the results. If everything goes well and the QPS service is working as intended, then you should not receive any email. The flow result should look like the image below.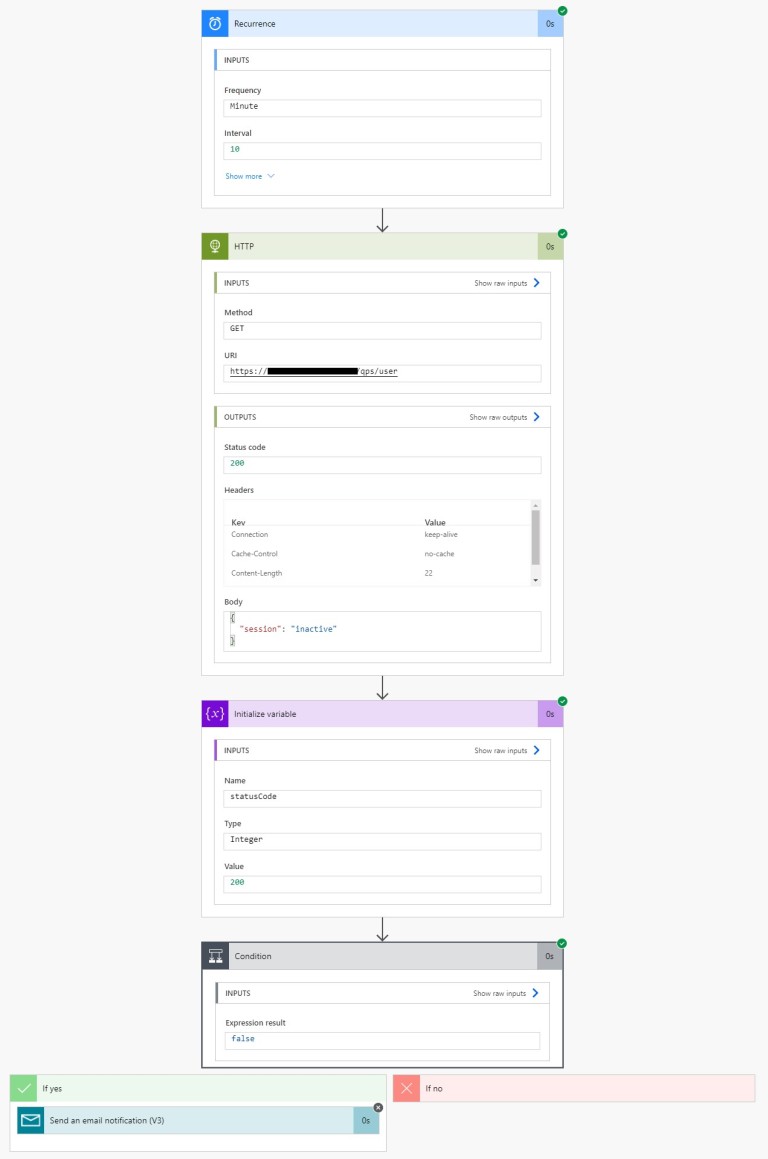
Power Automate Flow
You can change the condition value or logic to trigger the “Send email flow” and test the email notification. The email should contain the response content as a JSON file attachment. That same information should also be in the email content/body (if you have followed the optional steps).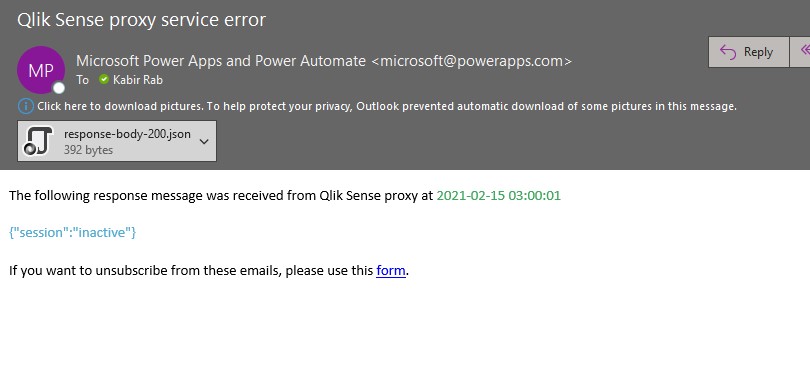
Email notification
This is just a simple example of what can be done with Power Automate. This approach can be enhanced and do more using the platform. E.g. You can send notifications to Teams channel as well as send an email, you can store the outcome (fails and successes) straight into a database for further analysis of your environment’s uptime. You can even use node.js on the Qlik Sense server, have a Power Automate flow where you can trigger a PowerShell script (with the help of Node.js) to restart the service when there is an issue. There are lots of potential with this type of integration and it certainly can make administrative tasks much easier thus making the Qlik Sense platform more robust and reliable for your business users.